If you’ve been wanting to make macrame items but haven’t known where to begin, this series on ‘Macrame For Beginners’ is exactly what you need. I’ll be covering the basics you need to know, to get you started in this craft that is growing in popularity every day. If you haven’t already read my article on the ‘7 basic supplies to begin macrame‘, then check it out so you can stock up and be ready to get started making amazing macrame pieces.

You can watch a video version of ‘MACRAME FOR BEGINNERS: PART 1, 4 Basic Macrame Knots’ on my YouTube channel ‘BohoJo’s Decor DIY‘.
Just click the video below.
Don’t forget to like and subscribe to my YouTube Channel to keep up to date with new videos when I upload them, including part 2 of ‘Macrame For Beginners’.
This page contains affiliate links that may earn me a commission (without any extra cost to you) if you click on a link and make a purchase. Please visit our privacy policy for more information. Affiliate links are how I keep this blog running, thank you.
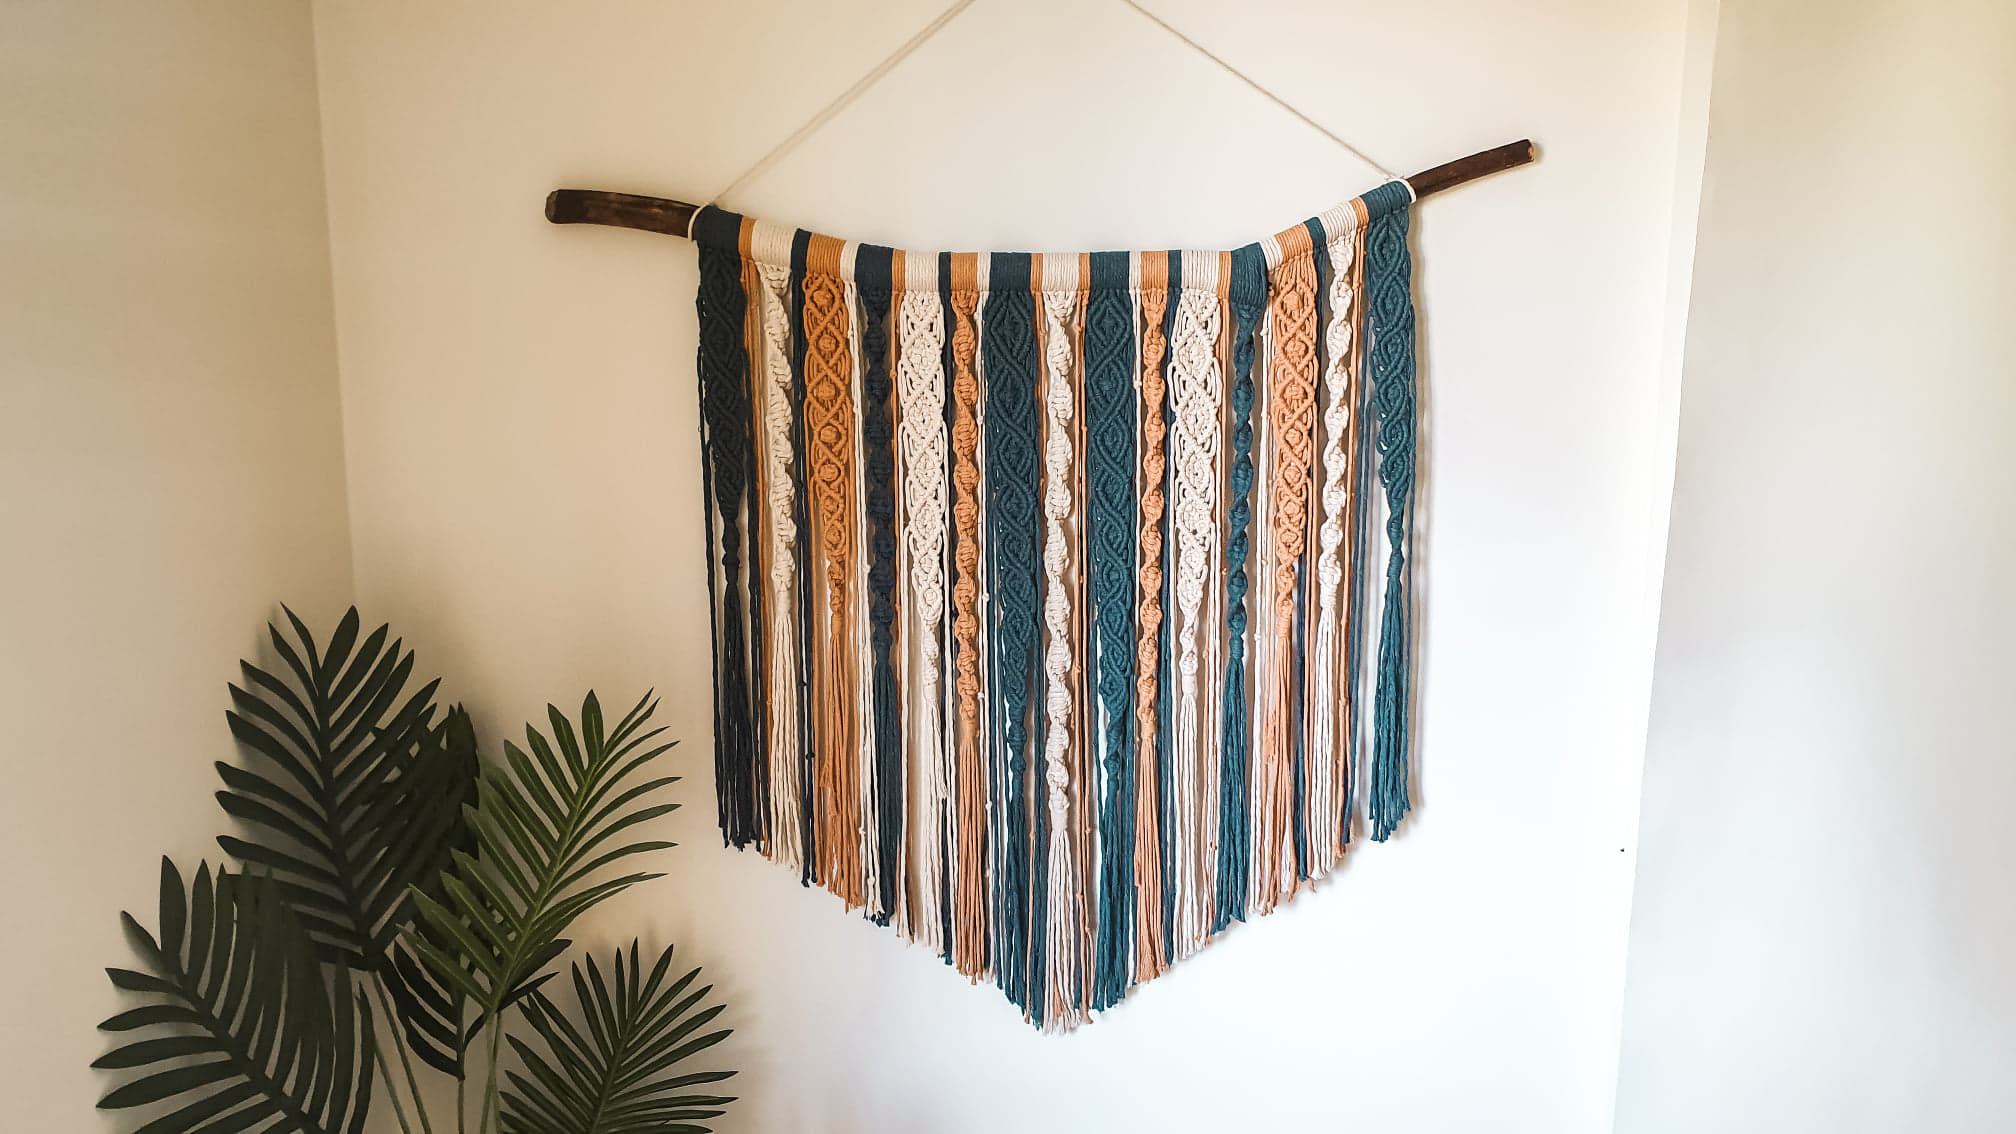
Macrame For Beginners
Macrame is ever increasing in popularity, both as a craft and as a home decor trend. It was huge in the 1960s and 1970s, but lost popularity throughout the 80s, 90s and early 00s. But like all fashion, it has made a comeback in the form of the bohemian/hippy style decor theme. Its popularity is easy to understand as these decor themes ooze an aesthetic of warmth and comfort, promoting a relaxing and calm environment that is all too necessary in a world as fast-paced as this.
The craft of creating macrame pieces can also be very relaxing and therapeutic, but it can also be daunting to know where to begin. Macrame is a lot simpler than some may think, but learning the basics is always an important start to learning any craft. Below I have explained 4 of the basic macrame knots that you will use in pretty much all of your macrame work. You will use these knots to create basic macrame patterns that are simple yet beautiful!
We will talk about more complex knots and patterns further on down the track, in future parts of ‘Macrame For Beginners’.
1. Larks Head Knot

The ‘Larks Head’ knot is the knot you will use to tie your cord to your rod or other macrame accessory. It can be used throughout macrame in more complicated pieces, but to begin with, you will simply use it to attach your cord.
The macrame cord that you attach to your rod, hoop, ring or branch, is one long cord folded in half.
To tie a larks head knot:
- Place the cord in front of your rod.
- Loop the folded end over and down.
- Pull the two cords through the loop.
- Tighten the knot.


It should look like this:

Pic Credit: ‘Macrame for all seasons’: Williamson, Barfield & Baird (1978, p17), Craft Publication, Inc.
2. Half Hitch Knot

Two names you’ll probably hear a lot in macrame tutorials are ‘working cord’ and ‘filler cord’. The working cords are the cords that you use to tie the knots, and the filler cords are the cords you tie the knots around.
The half hitch knot is basically a normal knot that you tie around your filler cord, with your working cord.
After you’ve attached the cord to your rod, with your larks head knot, choose one cord to be your filler cord. This cord will remain straight, as you wrap your working cord around it. For this tutorial I have chosen the cord on the right to be the filler cord and the cord on the left to be the working cord.
- Hold your filler cord straight
- Take the working cord around the back of the filler cord.
- Pull it up and over the filler cord, and through the loop.
- Pull it tight.


It should look something like this (before tightening):

Pic Credit: ‘Macrame for all seasons’: Williamson, Barfield & Baird (1978, p18), Craft Publication, Inc.
If you continue this knot down your filler cord, you will notice that the pattern starts to twist, leaving you with a pretty spiral!


3. Double Half Hitch Knot

A double half hitch knot is just like it sounds, two half hitch knots. This is the knot you will use to make patterns that follow lines, like in the picture above.
To tie a double half hitch knot:
- Hold your fill cord in the direction you want the pattern to go.
- Tie a half hitch knot on your filler cord.
- Then tie another half hitch knot.
- Pull tight.


It should look like this (before you tighten it):

Pic Credit: ‘Macrame for all seasons’: Williamson, Barfield & Baird (1978, p18), Craft Publication, Inc
To make a pattern, hold your filler cord in the direction you want the pattern to go, and tie double half hitch knots across your working cords.
To make the pattern above, tie two cords, using the larks head knot. Take the last cord on the right and hold it across your working cords down to the left. Tie double half hitch knots on the remaining 3 cords. Then hold your filler cord down to the right and repeat, making 3 double half hitch knots to the right.
4. Square Knot

The square knot is one of the most common yet important knots you will use in macrame. You can use it in so many ways to make pretty and unique patterns. It’s a little more complex than the other knots, but once you get the hang of it, you’ll feel like a pro.
Hang two cords using the larks head knot. You can start this knot on either side of your cords, but for this tutorial we will start on the left.
To tie a square knot:
- Take the first cord on the left and fold it across the front of your remaining cords (at a right angle).
- Take the cord on the far right, bring it in front of the first cord
- Then tuck it under the first cord, around the back of the two middle cords and through the loop on the left.
- Pull tight.


It should look like this (before tightening):

Pic Credit: ‘Macrame for all seasons’: Williamson, Barfield & Baird (1978, p17), Craft Publication, Inc.
This is half a square knot, also known as a ‘half knot’. If you use just this knot and repeat it all the way down, it will turn, providing another twisted design. We will use this design in future tutorials.
To complete your square knot, you will need to repeat this knot on the other (right) side:
- Take the last cord on the right and fold it across the front of your remaining cords (at a left angle).
- Take the cord on the far left, bring it in front of the first cord.
- Then tuck it under the first cord, around the back of the two middle cords and through the loop on the right.
- Pull tight.


It should look like this (before tightening):

Pic Credit: ‘Macrame for all seasons’: Williamson, Barfield & Baird (1978, p17), Craft Publication, Inc.

Basic Knots
And there you have four of the basic yet most important knots in macrame. Once you know these, you are well on your way to creating great works of macrame art. There are many other knots to learn (we’ll be discussing these in later posts), but most of them are a combination of these 4 basic knots.
Don’t forget to subscribe to my YouTube channel if you’d like to see all these posts in video format, or subscribe to the email list below to be notified when more DIY articles are posted, including the proceeding parts in this ‘Macrame for Beginners’ series.
If you’d like to see what macrame products you can make or would like to purchase some of my macrame and other decor products, visit my Etsy store at BohoJosDecor.
DIY Email Subscribe
Thanks for reading this article, don’t forget to sign up to our DIY email list to receive news about all the latest DIY articles, by filling in the form below.
MLS Email Subscribe
You can also subscribe to the Mum Life Stories email list to receive all the latest news, stories and competition information including writing competitions and give-aways by clicking the button below. You’ll also receive a FREE eBook!


Pingback: 7 Basic Supplies to Begin Macrame - Mum Life Stories
Pingback: MACRAME FOR BEGINNERS - Pt 2: How To Make A Macrame Feather/Leaf - Mum Life Stories